- Turn your montage into a "game" by including a "Hidden Treasure"
- Personalize your montages with a "Signature"
- Organize all your digital photos into easy-to-use "photo albums"
- Acquire images from digital cameras, scanners and other Twain-complaint
devices
- Enhance and crop your photo before you turn it into a montage
- Build and customize your own collection of micro-images
- Combine micro-images from various ArcSoft CD collections
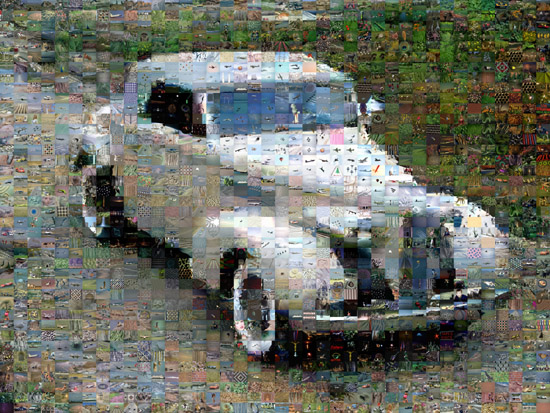
- Zoom in on your finished montage for a detailed view
- Instantly link to ArcSoft's PhotoMontage Web page
- Supports popular image formats including BMP, TIF, JPG, GIF, PCD, PCX, TGA, and FlashPix
|
|
Installation and Manual: Installation is a no-brainer. There isn't much of a manual, only a small 26
page booklet that serves as the CD cover, but you really don't need anything more elaborate. There is an excellent
Help section in the program if you do need more information.
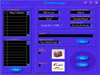
Interface and Screens: You just have five screens in PhotoMontage and they all are simply laid out and intuitive:
Main Screen, Get Photo Screen, Edit Screen, Build Screen, and the Collection Setup Screen.
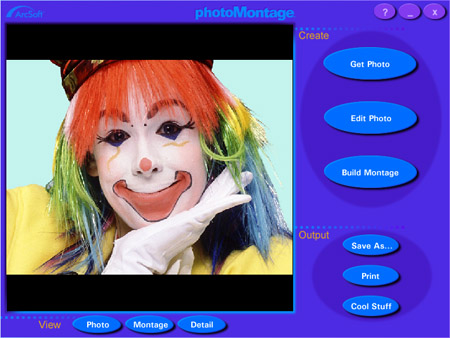
- Main Screen--The Main Screen
acts as your "homebase" in PhotoMontage. It contains buttons
that let you
 access the other screens, save
your montages and make printouts. It also contains a Main Display
Area so you can view "before," "after" and detailed
versions of your finished montage. The Get Photo Button takes you
to the Get Photo Screen, where you can choose your main photo as well
as create and update a photo album. The Edit Photo Button takes you
to the Edit Screen, where you can crop and adjust the brightness and
contrast of your main photos, while the Build Montage Button takes
you to the Build Screen, where you can select the settings and collections
for building your montage. The Save As Button opens the standard Windows
Save As dialog box, while the Print Button opens the standard Windows
Print Setup dialog box, and the Cool Stuff Button opens the "Special
PhotoMontage Services" screen which introduces you to program
add-ons. The Photo Button shows your main photo, and the Montage Button
shows the montage that you have just rendered, and the Detail Button
shows a full-screen, close-up view of your montage. access the other screens, save
your montages and make printouts. It also contains a Main Display
Area so you can view "before," "after" and detailed
versions of your finished montage. The Get Photo Button takes you
to the Get Photo Screen, where you can choose your main photo as well
as create and update a photo album. The Edit Photo Button takes you
to the Edit Screen, where you can crop and adjust the brightness and
contrast of your main photos, while the Build Montage Button takes
you to the Build Screen, where you can select the settings and collections
for building your montage. The Save As Button opens the standard Windows
Save As dialog box, while the Print Button opens the standard Windows
Print Setup dialog box, and the Cool Stuff Button opens the "Special
PhotoMontage Services" screen which introduces you to program
add-ons. The Photo Button shows your main photo, and the Montage Button
shows the montage that you have just rendered, and the Detail Button
shows a full-screen, close-up view of your montage.
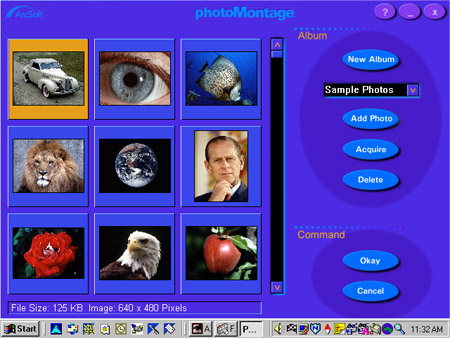
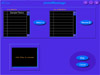
- Get Photo Screen--Here is where
you can choose the main photo for your montage. You may also create
a new album and add and remove thumbnails from the album. The New
Al
 bum
Button generates a new empty album to which you can add thumbnails,
while the Album Title Menu provides a list of existing albums. The
Add Photo Button opens the Windows Open dialog box from which you
can select image files to add to your active album, and the Acquire
Button lets you acquire images from a digital camera, scanner or other
installed Twain-complaint device. The Delete Button lets you remove
the selected thumbnails and the corresponding image files from the
active album. bum
Button generates a new empty album to which you can add thumbnails,
while the Album Title Menu provides a list of existing albums. The
Add Photo Button opens the Windows Open dialog box from which you
can select image files to add to your active album, and the Acquire
Button lets you acquire images from a digital camera, scanner or other
installed Twain-complaint device. The Delete Button lets you remove
the selected thumbnails and the corresponding image files from the
active album.
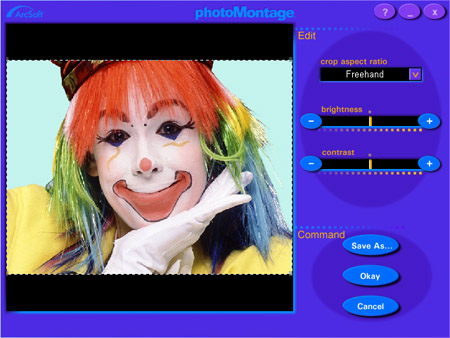
- Edit Screen--This screen gives
you easy-to-use tools for cropping and enhancing your main photo.
The Edit Display Area displays the image to be cropped and enhanced,
while the
 Crop Aspect Ratio Menu lets you discard unwanted portions of your
photo and make the photo a certain size or shape. The Brightness Control
Bar lets you increase or decrease the brightness of your entire photo,
and the Contrast Control Bar lets you increase or decrease the contrast
of your entire photo. And then there is the traditional Save As Button,
Okay Button, and Cancel Button, all self-explanatory.
Crop Aspect Ratio Menu lets you discard unwanted portions of your
photo and make the photo a certain size or shape. The Brightness Control
Bar lets you increase or decrease the brightness of your entire photo,
and the Contrast Control Bar lets you increase or decrease the contrast
of your entire photo. And then there is the traditional Save As Button,
Okay Button, and Cancel Button, all self-explanatory.
- Build Screen--This screen contains
several options for preparing your micro-images for rendering. The
CD Collections Menu displays your installed CD micro-image collections.
The My Collections Menu displays micro-image collections that you
have created from your album list. The Setup Button takes you to the
Collection Setup Screen. The Micro-image Count M
 enu
lets you specify the total number of micro-images in your montage,
while the Micro-image Size Menu lets you choose between small, medium
and large micro-images. The Output Size Information Box displays the
output data size of your montage, according to your micro-image count
and size settings. The Micro-image Pattern Menu lets you specify how
micro-images are stacked, and the Micro-image Repetition Menu lets
you choose how often each micro-image is used within a montage. The
Grid & Border Menu lets you add gridlines and/or a border to your
creation. With the Caption Box you add a line of text to your montage,
and the Font Button lets you pick the font, style, size and color
of your caption. The Caption Position Menu lets you specify the placement
of your caption. The Hidden Treasure Box/Signature Box lets you include
these two special photos within your montage. Again there is the traditional
Okay Button and the Cancel Button. enu
lets you specify the total number of micro-images in your montage,
while the Micro-image Size Menu lets you choose between small, medium
and large micro-images. The Output Size Information Box displays the
output data size of your montage, according to your micro-image count
and size settings. The Micro-image Pattern Menu lets you specify how
micro-images are stacked, and the Micro-image Repetition Menu lets
you choose how often each micro-image is used within a montage. The
Grid & Border Menu lets you add gridlines and/or a border to your
creation. With the Caption Box you add a line of text to your montage,
and the Font Button lets you pick the font, style, size and color
of your caption. The Caption Position Menu lets you specify the placement
of your caption. The Hidden Treasure Box/Signature Box lets you include
these two special photos within your montage. Again there is the traditional
Okay Button and the Cancel Button.
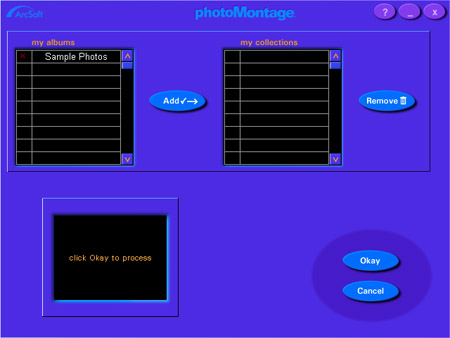
- Collection Setup Screen--Here
you can create new collections from your album
 images as well as rebuild and delete existing
collections. The My Albums Menu lists all your albums. The Add Button
adds album titles to the My Collection Menu. The My Collections Menu
lists all your collections. And the Remove Button, Processing Window,
Okay Button, and Cancel Button are self-explanatory. images as well as rebuild and delete existing
collections. The My Albums Menu lists all your albums. The Add Button
adds album titles to the My Collection Menu. The My Collections Menu
lists all your collections. And the Remove Button, Processing Window,
Okay Button, and Cancel Button are self-explanatory.
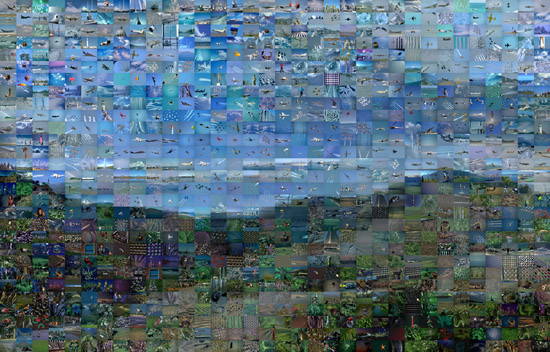
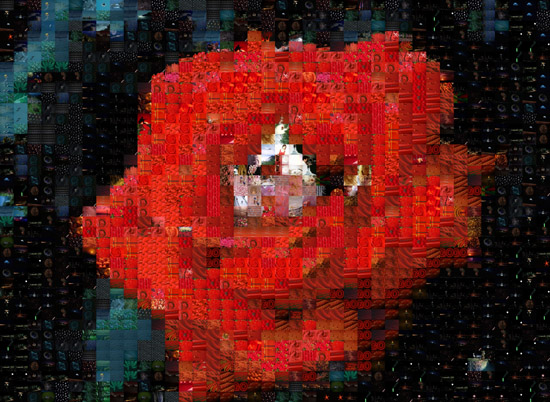
Creating a Montage: Once you get familiar with the five screens,
making a montage is easy. You have to select a photo. You can choose
one from the sample images or use one of your own images instead. To
get your images into an album, you use the New Album Button to create
a new empty 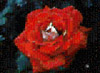 album.
Then you use the Add Photo Button to select the images you want to include.
You can then save this album so that you won't need to repeat the process.Once
you have an image to work with, you can edit the image with the Edit
Photo Button. Here you can crop the image and adjust the brightness
and contrast. Then you can build your montage with various options from
the Build Screen. You set the micro-image pattern, repetition, grid
and border options, fonts, etc. That is about it. You hit the Okay Button
and the process starts. Rendering time will vary depending on the size
of the image. album.
Then you use the Add Photo Button to select the images you want to include.
You can then save this album so that you won't need to repeat the process.Once
you have an image to work with, you can edit the image with the Edit
Photo Button. Here you can crop the image and adjust the brightness
and contrast. Then you can build your montage with various options from
the Build Screen. You set the micro-image pattern, repetition, grid
and border options, fonts, etc. That is about it. You hit the Okay Button
and the process starts. Rendering time will vary depending on the size
of the image.
|
 of these montages, it is useful
to have a wide-format printer; have a poster made; or use a tiling technique.
Adobe Illustrator or Adobe PageMaker have a tiling feature that allows
you to print large pages. The program divides the page into one or more
rectangles that correspond to the page size available on your printer.
Price: $79.95. There is only a Windows version available at this time,
but a Macintosh version is on the way. You can take a look at the full
line of ArcSoft software products on their Web site: http://www.arcsoft.com
The price for posters is: Size: 20"x13" is $24.95; 36"x24"
is $99.95. To have a poster make through the ArcSoft site, you upload
your image to: http://www.photoisland.com/photomontage/index.html
of these montages, it is useful
to have a wide-format printer; have a poster made; or use a tiling technique.
Adobe Illustrator or Adobe PageMaker have a tiling feature that allows
you to print large pages. The program divides the page into one or more
rectangles that correspond to the page size available on your printer.
Price: $79.95. There is only a Windows version available at this time,
but a Macintosh version is on the way. You can take a look at the full
line of ArcSoft software products on their Web site: http://www.arcsoft.com
The price for posters is: Size: 20"x13" is $24.95; 36"x24"
is $99.95. To have a poster make through the ArcSoft site, you upload
your image to: http://www.photoisland.com/photomontage/index.html