"Filters To Create Dazzling Effects!"
![]()
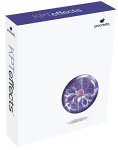
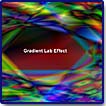
Procreate KPT Effects is a set of nine creative plug-in filters for Adobe Photoshop and other compatible hosts, that allows you to apply image transformations and original effects ranging from realistic to artistic to surprising. It can be used in Painter 7, CorelPhoto-Paint 10, and Bryce 5, as well. The product, created by Kai Krause, was originally known as Kai's Power Tools, and has been considered an invaluable plug-in for designers. In 1999, Corel acquired the software from MetaCreations, a company that Kai Krause co-founded. Corel then made it part of their new line, Procreate, a category of products that adds enhanced capabilities to your collection of tools. Procreate features KnockOut 2, KPT Effects and Painter 7. KPT Effects gives you tools to quickly render unique effects, with maximum control options. A unique feature of the program is that you can use the filters to enhance images as well as to create them, starting with a blank canvas. It includes a preset library that lets you get started quickly by choosing a predefined set of options for the plug-in filter you are using. You can keep the preset settings or customize them until you achieve exactly the result you want. You can also create presets, which help save time when repeatedly applying the same effect. Presets can also be exported to other programs. Unlike most plug-in programs that produce newer versions with patches or enhancements, each new version of KPT is completely unique. With this version, there are feature enhancements, and nine new KPT filters: Pyramid Paint, Lighting, Fluid, Hyper Tiling, Scatter, Channel Surfing, Ink Dropper, FraxFlame II, and Gradient Lab.
Procreate KPT Effects is available for the PC and Macintosh at the price of $199.00. See the Procreate web site for more information: http://www.procreate.com
Key Features
- Enhanced Color Picker: The Color Picker now lets you enter precise red-green-blue (RGB) values, and hue, luminance, and saturation values to get the exact color you want.
- User-Controlled Preferences: The Global options menu lets you set global preferences for all the KPT effects plug-in filters. For example, you can toggle between normal and smiley buttons on the user interface, or you can choose to show or hide the extended KPT effects desktop. The Filter options menu sets preferences for the individual filters, letting you choose how panels display and behave.
- Accuracy: You can manipulate control points and handles precisely, giving you greater control over your images. You can also see numeric values for slider positions as you move the sliders.
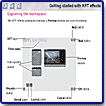
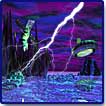
You access the KPT Effects interface from a host application, such as Photoshop, select your filter and options, and then render the effect in the software package you are using. The KPT workspace is very customizable. There is a Preview window that lets you view the effects you create. You can move and size this window and also apply a background to it. All filters have two panels: Recall and Layout. The Recall panel lets you use memory dots to save and compare up to nine versions of the same effect. When you no longer need a saved version, you can delete it. And the Layout panel lets you use memory dots to save different workspace layouts. Then, each filter contains other filter-specific panels that let you adjust the effect you create. You can set the style in which panels display, and you can set the attributes of an effect by moving sliders or by typing values. Each filter provides preset effects. You can load preset effects, save effects you create as presets, and organize presets in categories. When you are unsure how to perform a task, you can use the KPT effects Help. See image to the left for a view of the interface.
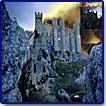
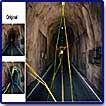
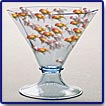
With the KPT Channel Surfing filter you can split an image into RGB and HLS color channels, which allows you to apply an effect to one or all of the channels: Red, Green, Blue, Hue, Luminance, and Saturation. It's possible to blur or sharpen a channel, or adjust its contrast or value. You can adjust the strength of an effect in two ways: by globally adjusting its amount and by using another channel to attenuate the effect in varying amounts across the image. When you attenuate an effect, you decrease its amount based on another channel known as the attenuating channel. For example, if you are applying a blur effect to an image and you choose the Red channel as the attenuating channel, the blur amount will be adjusted based on the value of the Red channel. After you have achieved the effect you want, you can adjust the effect's transparency and control how the effect blends with the source image. You can choose from the following blend modes: Normal, Put behind, Dissolve, Inverse, Multiply, Multiply norm, Screen, Screen norm, Lighten, Darken, Procedural, Procedural inv, Extrapolate, Difference, Similarity, Difference inv, Similarity inv, Hue, Saturation, Color, and Brightness. See image to the left for a view of the Channel Surfing effect.
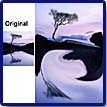
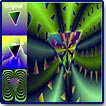
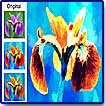
With the KPT FraxFlame II filter, you can explore and mutate an infinite variety of flame fractals. A fractal is a geometric pattern repeated at very small scales to produce irregular shapes like crystal clouds. Fractals can be customized with various color, contrast, and distortion techniques. You can choose from seven preset style: Linear, Sinusoidal, Spherical, Swirl, Horseshoe, Polar, and Bent. Once you have chosen a fractal style, you can mutate the parameters of the parent fractal. See image to the left for a view of the FraxFlame II effect. It shows the original, a large image with the effect, and then another smaller image with the effect.
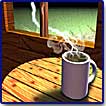
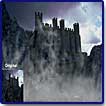
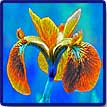
KPT Effects is an impressive package. Bottom line--this is a must have effects program that is topnotch. It takes a while to get used to the nonstandard interface, but it's easy to learn and use. And the program is not a simple point, click, and instant effects package. It's powerful, sophisticated, and includes numerous option panels that are filter-specific so you need to experiment with them to see how they work to get the look you want. The program could benefit from onscreen tool tips, the ability to switch from one effect to another within the KPT Effects interface, and tutorials. Some of the effects are pretty straightforward to use, but some have so many options that it is a little bit intimidating at first. The User Guide does an excellent job of explaining the various filter options, but I still didn't know how to put the information together. Since, I tend to be tutorial obsessive and probably spoiled by having tutorials in other Corel products, such as CorelDraw and Corel PhotoPaint, I looked for tutorials to help me get started. I could not find any on the Corel or Procreate site. Nor is there any mention of tutorials in the User Guide. I happened to find some in the User Guide that was buried in the program files for Painter 7. They clarified how to use each filter, and then as I got braver, I really began to experiment. I must say I am impressed with the program and its ability to make your design time fun, creative, and unlimited in possibilities. For instance, the image to the left was created using the Pyramid Paint filter. After I had applied the filter, I used the Fade option in Photoshop to fade it 50% and then changed the color mode from normal to color.
Windows:
- Windows 98, 2000, NT 4.0 Service Pack 6, or Windows Me
- IBM-compatible PC, Pentium 166 processor or higher
- Adobe Photoshop 4 or higher (or compatible host)
- 32MB RAM or greater allocated to host (64 MB recommended)
- 25 MB or greater available hard disk space
- 24-bit (800 x 600) color display
- CD-ROM drive
- Mouse or tablet
Macintosh:
- Mac OS 8.6 or higher, or Mac OS X
- Power Macintosh (180 MHz or faster recommended)
- Adobe Photoshop 4 or higher (or compatible host)
- 32 MB RAM or greater allocated to host (64 MB or greater recommended)
- 128 MB RAM for Mac OS X
- 25 MB or greater available hard disk space
- 24-bit (800 x 600) color display (1024 x768 for Mac OS X)
- CD-ROM drive
- Mouse or tablet
Web Page Design: Macromedia Dreamweaver 4.0
| Educational | Books | Utilities | Web Tools | Legal | Articles
