FILLING A HOLE
HOME ORDER ONLINE PRODUCTS REGISTER CONTACT US

It was around 1985 when we were The Luthiers Mercantile and we had a container of Brazilian rosewood boards to process into sets. It wasn't very good wood, tended toward gray, was very wormy, lots of pinholes, virtually nothing quartersawn, but it was Brazilian rosewood. John Arnt from C.F. Martin came out to inspect several hundred sets and took back with him something over 100 sets. John said that at that time their process was to bleach both the backs and sides, and then dye them to match. He said they bathed both the backs and sides in cyanoacyrlate to counter drying checks, and that they filled the pin holes with sanding dust and epoxy.
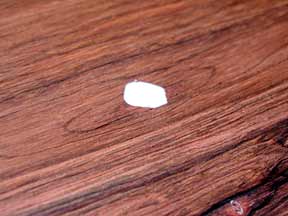
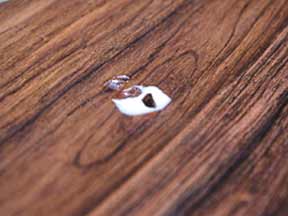
That wood was lighter colored, more like eastern walnut, and disguising wormholes, checks, and the like was a fair amount of work. Of course, they never went to extremes to disguise the defects, but it is possible to completely hide most of them if you need to. For example, some go as far as to use indelible black ink and continue a grainline through and over a hole. And a few are known to enhance a hole. Taku Sakashita, whose aesthetic is unusual, often fills a wormhole with white, or a contrasting color rather than with a matching color.
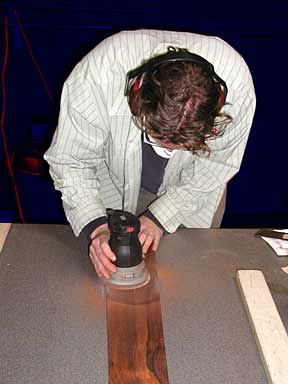
The below photos show a couple of different ways of dealing with holes and are of builder Stephen Stratton in action. The photos are thumbnails and can be clicked on to enlarge.
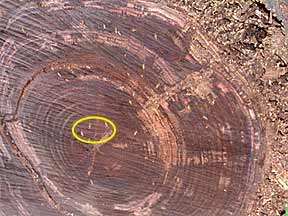
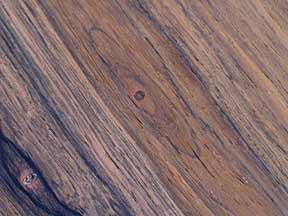
Anyone who's ever dealt with Brazilian rosewood knows wormholes and pinholes, but have you ever seen those pesky bugs? This is the end view of log which was a standing dead tree. About 6" of the end was lopped off to see the grain.
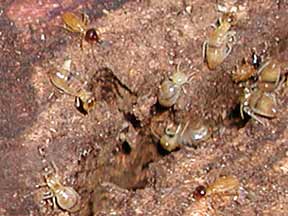
This is close-up of the bloated lackey wood mongers: termites.
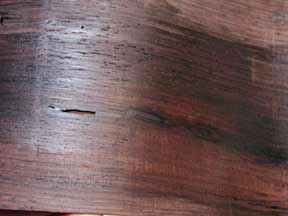
Larger than most wormholes, but not unusual in Brazilian rosewood, this type of hole can be filled with cyanoacrylate or two-part epoxy. Cyano is better for splits and checks because of its wicking action, while epoxy is good where gap-filling is needed
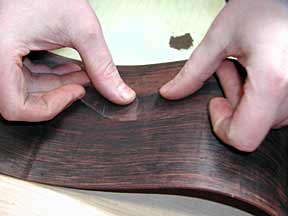
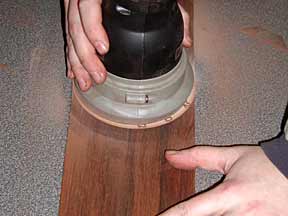
If the hole is in the side, it's better to bend the side first. Cyano can take about 350 degrees before it breaks down, while epoxy will break down at about 150 degrees. Neither can withstand bending temperatures.
Epoxy might be a little faster to use than cyano, just because you have to build up with layers of cyano (don't use the gap-filling type).
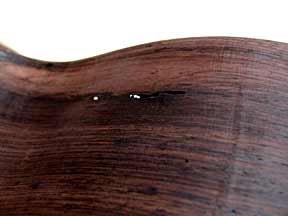
The side is bent, and ready to be repaired.
A close-up of the worm hole.
Clean out the hole.
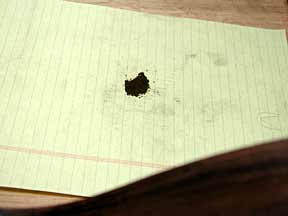
Sanding dust gathered and ready to be used.
Use Scotch tape on the inside of side to back up the hole. Don't use strapping tape or reinforced tape. It tends to lift up the grain.
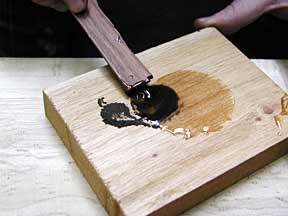
Mix the 2-part epoxy.
Add the sanding dust.
Pack into the hole(s), and build it a little proud of the surface.
Let dry.
Sand.
The dust could have been a little darker, but it does darken up when finish is applied, as in the photo below, left. (Note, not all holes are filled in these photos.)
A coat of finish is rubbed on to show how the filled hole blends in. The filled hole will reflect light a little differently, but if you use an epoxy with the same index of refraction as the lacquer you are using, then you'll be fine.
A close-up.
In the above guitar by Ervin Somogyi, no attempt is made to hide the wormholes. Wormholes are virtual assurance that the wood is indeed, Brazilian rosewood.
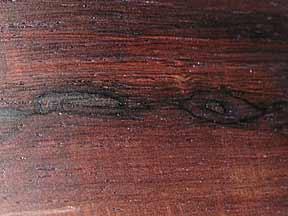
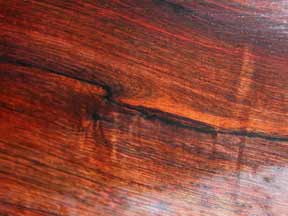
A beautiful quartersawn side has a resin pocket that will open up in time. What to do? Fix it. Of course, this should have been bent before fixing, but we were in a hurry. This example will serve better if you pretend this side is a back.
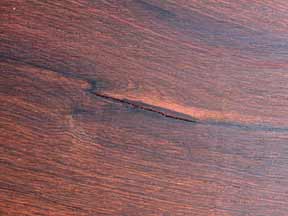
These are fairly common in the more figured wood. Often overlooked as just heavy, hard, "black" lines, they should be checked carefully for any sign of a fissure or cleft.
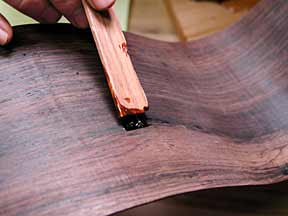
Gather sanding dust and pack it in, using your finger, rasor blade, and/or whatever else is needed.
Flood the split with cyanoacylate (thin, not gap-filling).
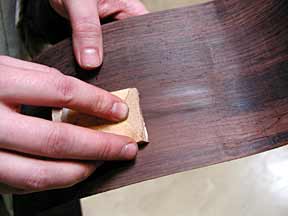
When dry, sand.
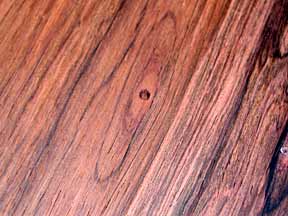
At right, with finish on it, the fill is indistinguishable from the surrounding wood.
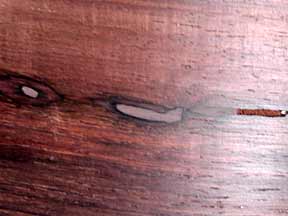
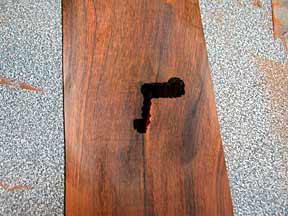
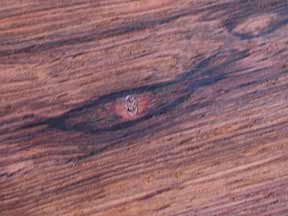
The larger wormholes should be plugged with a dowl.
This wormhole is just to the right of the one in the photo at left. We didn't fill it, but this is an example of a hole that is very easy to disguise. Or this kind of hole can also be a point of interest. In fact a glass eye might look pretty good here.
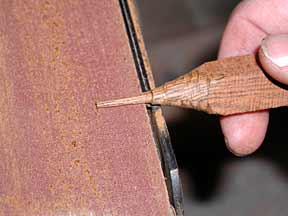
Get the next larger sized bit to drill through and clean the hole.
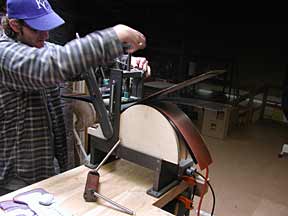
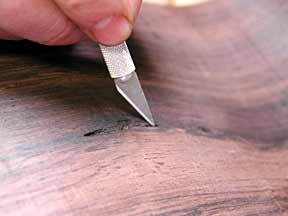
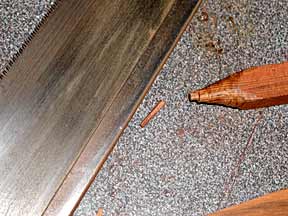
Make a dowel out of matching wood using a knife and a sanding belt. If you have a fastidious nature, you might want to make the dowel so that edge grain (more stable, too) rather than end grain is seen on the surface.
Cut off a little dowel
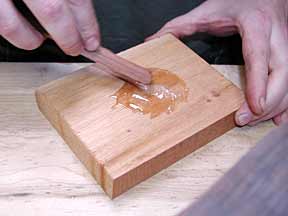
Puddle some glue into the hole. Titebond, or a high-test PVA glue can be used.
Jam the dowel in and let dry.
Chisel off, sand and voilà, you're ready to finish.
Please let us hear any comments, tips or tricks that we can add here. We're happy to give you credit, or even better, a Brazilian rosewood pen blank for making dowels. Wow!
At right is builder/repairman Stephen Stratton. It's his handy-work we've covered here.
Above photo of Stephen taken when he worked at CFOX Guitars.
In order to conform to Allied Lutherie's dress code, Stephen was forced to endure a complete makeover.

Address General Information Sales/support Telephone:
707-431-3760 POB 217, 101 C Grant Avenue, Healdsburg, Ca. 95448 USA info@alliedlutherie.com sales@alliedlutherie.com Fax:
707-431-3762 New Price List