 |
|||||
 |
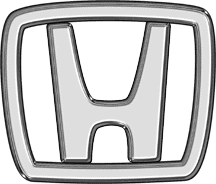
CHROMIUM By Robert Eardley (from ActionXchange) I needed to make a Honda Logo for my automobile site. I put the shape together in Illustrator based on the their present logo. This action did a rather nice job of turning a black shape into chrome, although I still want to play with it some more. The effect changes drastically with the size of the original, with the use of a larger images, as shown here (5" wide @ 288 pixels when the Action was run) producing a more subtle effect. |
||||
| RESIZE-IT By Charles Kemper Resizing is one of the most common task we perform as Web Designers. (When was the last time you added a photo to a Web page without resizing it?) It can be as easy as merely going to Image/Resize on the menu, however there are a few things that will work against your achieving optimal results in a medium like the Web with such a minimal effort. First thing to remember is that the Web, at a mere 72 dpi, is a fairly low resolution medium. The second is that the way a raster program like Photoshop resizes images is by averaging adjoining pixels, further degrading the sharpness of the image—and of course this degradation is more pronounced the lower the resolution. While we will never achieve sharpness on the screen (unless, of course we crank up the screen resolution for the monitor size but the image will get smaller) we should always strive for the appearance of sharpness. One of the most important tools available to us, as Web designers, is the unsharp mask that resides in the Filter/Sharpen menu. I find that I not only hit the photo with the unsharpen mask after resizing, but also before. The action viewed here performs both of these sharpen actions (it is currently set up to work optimally with photos in the 500–1000 pixel dimension range. The other action it performs, which I find most photos benefit from, is to slightly bump up the color saturation. The top photo on the right was resized without any sharpening whatsoever. The one on the lower right was resized via the action. You will particularly notice the differences in sharpness in the highlighted hair around the face and neck, in the keyboard, and in the fish (look carefully at the eye). Here is the ACTION. Remember you can change any aspect of it to accomodate the images you are working with. |
  |
||||
 |
FRAME-IT By Charles Kemper Another area where Actions can be very useful is with image treatments. These are the treatments we use to give a site a feel. They may be as simple as adding a drop shadow, or a more complex edge treatment or frame. The frame to the right requires 22 steps to build. To apply this to 20 photos would require 440 steps, which would have to be remembered and repeated in the correct order to remain consistant. Building a set of ACTIONS can greatly simplify the process—saving time while ensuring consistancy. For an example of where I used a set of actions similiar to this on a client's site, view the Atlas Peak Vineyards' Photo Tour. **Quick note on downloading these actions: On Macs, click on link and hold key down/save link to disk. On PCs use right hand click. Also, this actions is set up to work with an image no larger than 3.5" X 4.5". To have it work on an image larger in either dimention, double click on the second step of the action (Canvas Size) and reset to 1 inch larger in each direction. To work properly, you must start with a flattened image with the layer titled background. And finally, remember that the first step of this action is to take a snapshot so if something goes wrong, or you don't like the effect, click on the shapshot to return to your starting place. |
||||
|
|
|||||