Let there be depth! - Stereo 3D

First we must understand the nature of a 3-Dimensional moment in time. The reason that we judge and appreciate depth is that we have two planar, 2-Dimensional references at any given time... our two eyes. By adjusting the angle of each eye, we can focus on objects at any arbitrary distance, throwing objects at other distances out of focus. This contrast between focus and blur, along with an inner knowledge of how our eyes are aligned and the distance between them, gives us the ability to estimate the distance to an unknown object - of course size recognition of known objects helps us judge quicker. This is tri-angulation - the measuring of a distance given two reference points, the distance between them, and the angles to point at the distant subject.

Notice in the diagram to the left...Figure 1... by knowing the distance between two visual reference points (red), and the angle of each eye (blue) when pointed at the distant subject (orange circle), we can determine the distance (orange) to the subject.

So if we capture two images from a scene at appropriate angles, we can then view the scene later in three dimensions. This denotes a stereo pair.

3D Photo Pair - stereo, two separate planes (left / right) of vision, taken from relative angles and distances as to mimic human depth triangulation.

2D Photo Single - mono, one plane of vision


Viewing Stereo 3D Pairs

1) Viewing Normally

Now that you understand the nature of stereo 3D imagery, you must unlearn your normal instinct to focus on the 2D plane of the image pair and re-develop your ability to cross focus on the composite 3D pair. Physically, you need to mildly cross your eyes to a point where the left and right images combine to make one image. When you initially get focus of some element in the pair, hold that until your eyes are fully relaxed, then begin to examine the rest of the scene. Your eyes / brain will process the furthest point in the picture as you would normally looking at the horizon outside... and closer objects will feel relative.

Some people can cross focus quicker and easier than others... my first tries took 2 - 4 minutes to get and now I can focus instantly (given a good stereo pair). The most common mistake that new viewers make is overcrossing their eyes. If everything is beyond recognition, re-try from normal focus. One trick that might help is to extend your arms out and put your pointer fingers up, then focus so that you can see three fingers with the one in the middle being a composite. If your get frustrated, try again later, but it's worth it once you've got focus...amazing depth!

To view some Stereo Pairs now... go to the Optimized 3D Stereo Viewing Page.

2) Viewing with Polarized Printing and Glasses

One recently developed and patented technique from the Polaroid company, allows you to print your Stereo 3D pairs using special inks on polarized, layered sheets. You then get a $3 pair of glasses, vertically polarized in one eye, horizontal in the other and you can view the picture without having to adjust your focus. The glasses are almost transparent - slightly grey, making the color quality and detail much better than classic red / blue pairs. The San Francisco Slide Factory will take your high res images (300dpi) and process them into a polarized image or polarized slide transparency for about $90.00. The pictures are very cool. Awesome for bringing your viewers into the picture.

3) Viewing Slides with a Stereo Projector

Another way to view Stereo 3D without cross focusing... Load your two of your regular slides into your hand held depth projector and see amazingly rich light and depth.

4) Viewing with a Stereo 3D Headset Attached to your Video Card.

Some video cards offer a stereo-3D plug for VR headsets as a regular feature. Check out Dynamic Pictures / 3D Labs for information on their Oxygen and RPM video cards with stereo compatability. Also check out StereoGraphics' Crystal Eyes stereo 3D headsets.


Making Stereo 3D Pairs

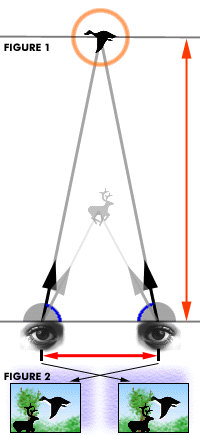
You can easily make your own 3D Stereo Pairs with camera photographs, video or film, or with computer generated 3D scenes.

1) Still Camera Photography

a. Using a traditional single camera

This is the fastest, easiest and cheapest way to get started in stereo photography...but it is not appropriate for shooting moving objects such as human figures, animals, etc. Find a subject to shoot that has several layers of depth and good lighting. Patches of trees or flowers are an excellent place to start. Decide on a height to take your shots at (standing, kneeling, etc...). Look through your viewfinder and find a framing that includes all of the main subject and some fore or background elements. Next find a distinctive area of the background (a distant tree, structure or natural intersection) and center it in your viewfinder. Take your first shot. Now strafe to the right maybe 1 foot and take another shot with the same background element centered. Strafe right another foot and shoot again...then maybe 2 more feet and another shot. This group of shots will give you a good range to choose which pair best captures the depth while not over positioning the literal distance between objects in the scene. The best distance to strafe between pictures is related to the proximity of foreground, subject, and backgroud. As you gain experience, you will be able to judge this better and take fewer, higher quality shots for stereo vision.

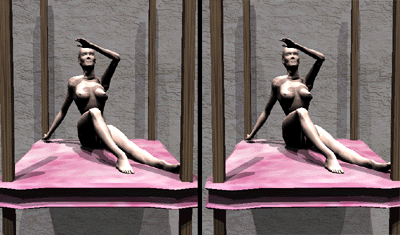
When you get the photos developed, you can put them side by side and check which pair looks best. Note: In this example, you strafed right for the 2nd, 3rd, 4th shot...When viewing the images, you will put the right shot on the left side and the left shot on the right side. Think about it and it'll make sense.

b. Using a two camera system with constraint and synchronized shutters.

If you have access to two similar cameras, you can build a stereo photography constraint that has adjustable photographic distances and angles. This system allows you to capture moving, living objects with high quality. A range of 1/2 ft to 4 ft of relative strafe adjustability and angling in from 1 to 20 degrees should be a good setup for subjects from 3 - 20 ft away. You will want to manually match the f-stops and shutter speeds of the cameras and use a syncronized remote grip switch to trigger the shutters.

2) Video and Motion Film

Capturing motion stereo 3D sequences requires a similar constraint and synchronizing system that a two camera still configuration does.

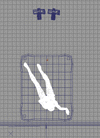
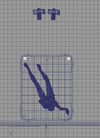
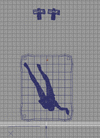
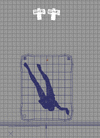
3) Computer Generated 3D Scenes

If you want to practice stereo image composition, computer 3D is an excellent medium to generate custom scenes and quickly check your results. It doesn't matter whether you use Asymetrix 3DFX ($49.00) or A/W Maya ($20,000 +)...the principles remain the same. Maya and some other high end 3D packages offer built in stereo rendering, but setting it up manually is fairly easy. I recommend creating a null object (axes or a super small scaled object) and positioning it at the furthest object of detail or the horizon. Assign the camera to look at the null. Next attach the null object as a parent of your 3D camera. Now you can rotate the group from the null's axis to move and angle your camera...it's generally best to rotate 1/2 to 10 degrees, depending on the proximity of fore, mid and back-ground elements.


The Elements of a Good 3-D Stereo Scene

If the single subject of the scene is a human, as in this demonstration, the figure should be positioned in an interesting way that exploits the depth of the person. Sitting, lying down, or otherwise dynamically posed is preferred to allow the viewer to judge the volume and size of individual body parts easily. Standing straight may be more appropriate if there is additional subject matter in the scene, such as a photo with Mount Rushmore in the background, or complex props positioned in front and behind the person to show not only the persons expression, but also their surroundings.
Foreground elements in a scene can offer a greater mean depth in the final stereo pair. Even if the foreground objects are not too detailed, such as the wooded posts in this example, the extra depth will give the viewer a greater range of objects to focus on. I feel that it is generally best to only include foreground objects if they will show up in both the right and left pictures of the pair. If they are too close to the camera, the change in angle and position will cause the objects to appear in only one of the pictures, making them appear always out of focus by the viewer.
The focal termination point or pivot point is an important area to define as you set up your scene. It's generally best to identify what the furthest area of worthy detail is in the shoot and use that as a pivot point for your camera(s). In this example, the stucco wall is the focal termination area, not allowing the viewer to see beyond it. For a computer generated 3D scene, you can create a null object at the center of the wall and use it to rotate your cameras into appropriate positions.

The visual reference points (still camera(s), video camera(s), or CG 3D camera(s)) need to be positioned and angled to maximize the depth of the scene while avoiding over accentuating the literal distance between any object in the stereo pair. This is the hardest part of taking stereo 3D pictures and depends on the distances between fore, mid and background elements of the scene, and the focal angle of your camera. I recommend going out and taking a couple rolls of film to practice and work with 3D CG scenes to experiment and learn what suits your style.

Note that you only need one still camera to take pictures of non moving objects... Take one shot then strafe to your side, adjust your angle to point at your focal termination pivot and take the next. If you want to take pictures of moving objects such as human figures, animals, etc... you need to build a physical constraint tripod to hold two cameras at adjustable distances and angles, and use your cameras remote switch to syncronize the shots. (use the same f-stop and shutter speed too)

If you have any further questions on Stereo 3D techniques or technology, or if you have 3D photos / artwork to show, don't hesitate to email me - Jason Cooper - jcooper420@hotmail.com