|


| |
|
|
AMAZING MYCO-STIX
Workshop Leader:
Dorothy Beebee, (USA)
(in lieu of Miriam C. Rice)
|
|
|
At the 10th International Fungi & Fiber Symposium
in Rovaniemi, Finland, August 2001, Miriam C. Rice introduced her newest
experimental work with mushroom dye pigments:
|
|
|
|
"MycoStix"© , a
drawing tool similar to crayon or Conté in appearance, but with a
greater range of possible uses. Myco-Stix can be used for either
watercolor or oil painting, pastels, or for encaustic, depending on which kind
of binder is added to the mushroom pigment,
|

Photo by Andrea Marks, (USA)
Myco-Stix
Exhibit
|
|
|
|
and what type of drawing surface is
used. Miriam feels that this work is just in its beginning stages, just like the
mushroom dyes were 30 years ago, and is looking forward to presenting further
developments in the range of color, by experimenting with Australian species.
She continues to extend the invitation to all to join in the experimentation at
the 11th International Fungi & Fiber Symposium in Denmark,
Australia. And just look how far the mushroom dyes have gone!
|
|
|
|
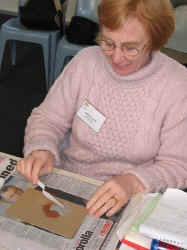
photo by Bobi Ward (Green
Skills)
Janice
Laud (Australia) making
Myco-Stix
|
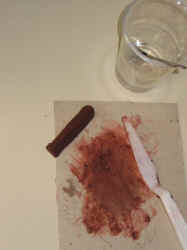
photo by Bobi Ward (Green
Skills)
Finished
Myco-Stix
|
|
|
|
Since Miriam was unable to attend the Symposium, her associate Dorothy Beebee
presented the Myco-Stix workshop, following Miriam’s intent to use only
Australian species of fungi, and "pencil clay "as a simple
"medium/binder". We explored the possibilities of using dried samples
of Dermocybe splendida, Anthrocophyllum archeri, and an
unidentified fresh Dermocybe sp.(which we were drying by the heater). We
used an old electric coffee grinder to pulverize the fungi into fine granules,
and then strained those granules through a fine strainer, until we had the
finest possible powdery consistency to blend with the pencil clay and a tiny bit
of water. Then the Myco-Stix were molded by hand into a short triangular
shape which Miriam prefers, and set aside to dry slowly for 24 hours before use
. (Since this class was on the last day of the Symposium, none of us really had
a chance to draw with them until we returned to our respective homes).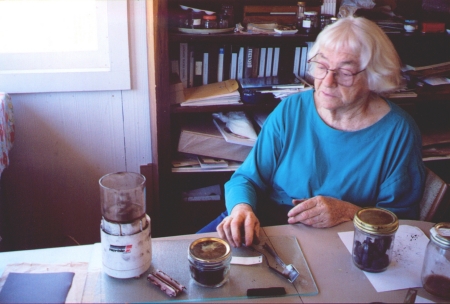
Photo by Andrea Marks, (USA)
Miriam
Rice making Myco-Stix in her studio.
|
|
|
|
|
The second part of the class was spent using those Myco-stix
which had been pre-made by Miriam Rice using California fungi and variety of
media, (beeswax, Psuedohydnum gelatinosum, and pencil clay). Different
types and textures of paper (drawing, pastel and watercolor) were offered to the
students to explore the many possibilities of the medium using both wet and dry
papers.
We then, took the exploration one step further and introduced a new technique
at the Australian Symposium, by using samples of many types of fabric on
which
|
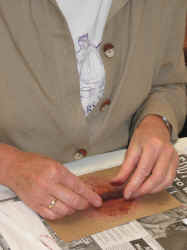
photo by Bobi Ward (Green
Skills)
Making
Myco-Stix
|
|
|
|
to draw or paint….China silk, raw silk, cotton, wool, hemp, canvas,
linen and several blends produced some amazing results. And then everyone drew a
little picture or wrote a message with the Myco-Stix on a fine woolen
scarf (from a wonderful woolen craft shop in the town
|
|
|
|
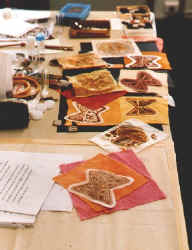
Photo by Andrea Marks, (USA)
drawing
samples with
Myco_Stix
– Butterflies by Dorothy Beebee
|
of Denmark), to send to
Miriam who was unable to attend the Symposium because of health problems. The
class was supposed to last only for the morning, but so many students were
interested, we extended it to an "open studio" for students to
continue to explore the possibilities of Myco-Stix on fabric. The
finished swatches of cloth were then ironed with a steam iron, between paper
towels, to set the Myco-Stix colors on the individual pieces of fabric.
|
|
|
|

Photo by Andrea Marks, (USA)
"Brit
Jorgensen (Norway) drawing on scarf
for Miriam with Myco-Stix"
|
|
|
|
|
|
|

|


