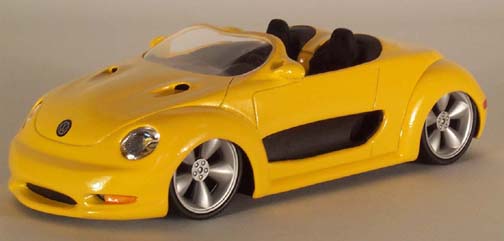
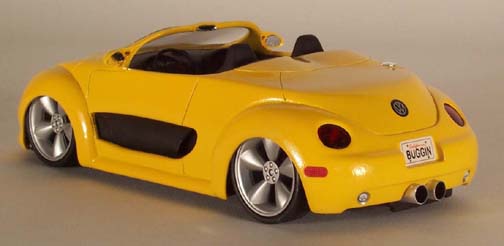
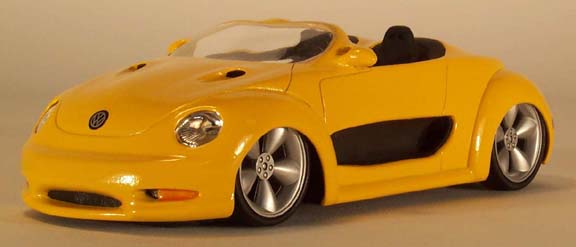
VW MACH III SPEEDSTER
REVELL VW BEETLE / MUSTANG MACH III KIT BASH
BUILT BY IRA DAHM (4/03)


15TH PLACE WINNER IN THE 10TH ANNUAL
CUSTOM CLINIC CONTEST!
FEATURED ON THE COVER AND IN THE CONTEST PHOTOS IN ISSUE
#112 OF MODEL CARS MAGAZINE!
SEE MORE PHOTOS BELOW!!!
The Revell New Beetle, Revell Mustang Mach
III and the AMT Street Heat supplied the parts for the VW Speedster. I've
always liked the styling of the VW Beetle, that is up until the new Beetle
was introduced. Something about the square windshield and the square rear
window didn't seem quite right on this very roundly styled bug. I like the
rest of the Beetle but, the top has to go. The windshield, hood and interior
from the Mustang Mach III concept car seemed to match the Beetles smooth
round styling. Blending the sections from the two cars looked like it would
work, so I started cutting up the bodies.
Here's how the VW Speedster was built. (See
construction photos below.) First I cut the front section off the Mach III
interior and fit it into the Beetle body, it was a great fit. Then I cut
off the VW top off and I cut out the windshield frame and body panels around
the Mach III interior. I cut the Mach III body section oversized to leave
room for final fitting. More cutting and fitting was done until the fit
was right. Next I fit the Mach III body section to the Beetle. The fit was
very close. I attached the two body sections with CA glue. After the glue
dried, I used the Dremel tool and ground off the excess plastic from the
Mach III body piece. The Mach III body area on the sides of the interior
were less than 1/16" wide after I did the the final fitting and grinding.
I added a 1/16" strip of plastic along the inside of the Mach III sides
to make them as wide as the Beetle body edge. The Beetle hood was then partially
cut to fit the Mach III hood which had also been cut down to size. The front
VW bumper was cut off and replaced with the Mach III lower front end section.
Next, the Mach III side vent body sections were cut out and fit to the Beetle
sides which were then cut out to hold the vents. Two holes were drilled
in the lower rear body for the new exhaust pipes.
The body was then puttied, sanded and primed.
New door, hood and trunk lines were then scribed in. The VW frame was modified
to make room for the wheels and tires from the AMT Street Heat. I set up
the VW Speedster so low that I had to grind away part of the inner headlight
housings to clear the tires. The exhaust pipes were made with aluminum tubing.
The body was painted with three coats of
Testors Yellow and Glosscote. The interior, side vents and frame were painted
with Krylon Ultra Flat Black. The top flat area of the console was painted
with the Testors Yellow to bring the exterior color into the interior and
the gauges were painted silver.
