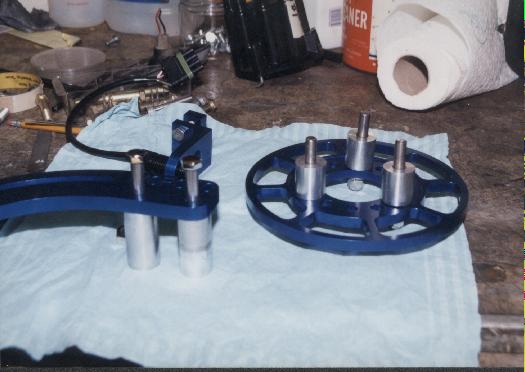
| Well here is the hardware just before installation.
Being that I didn't want to move the crank, water pump, and alternator
pulleys out I had to mount the wheel on the outside of the crank pulley.
I had to make three spacers to move the wheel out and the two longer ones
to reposition the pickup arm so that the sensor would be centered over
the wheel. |
 |
| One step closer to putting them on the car. |
 |
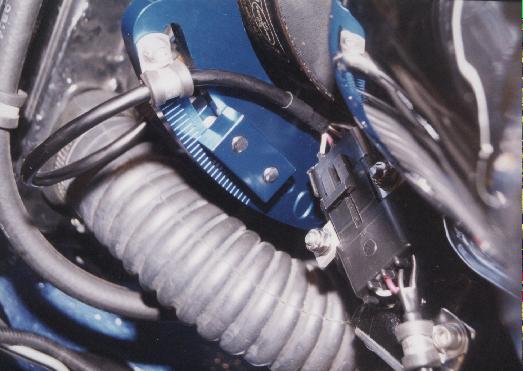
| Got the wheel mounted to the damper. Mounting it out
in space like this I lost the use of the centering rings. Here I
have the dial indicator setup adjusting run out. They spec'd +/-
.010". I got it down to +/- .002" run out. I got lucky here
as it pretty much centered up with just a few taps. Wasn't much fun
pulling the motor through by the flywheel while trying to monitor the indicator though.
You can really tell by this picture but it was not an easy task getting
the dial indicator in position. The magnetic base and arms zigzagged
back and forth several times to position the darn thing. Took longer
to mount it than to adjust the run out. |
 |
| You can see how close the pickup and the output lead came
to the lower radiator hose. I lucked out here because when they potted
the wire into the pickup housing they got it off center. Was able
to rotate the pickup for maximum clearance. Some of the strain relief's
and mounting of the connector can be seen also. I didn't want that
heavy connector flopping around in space. |
 |
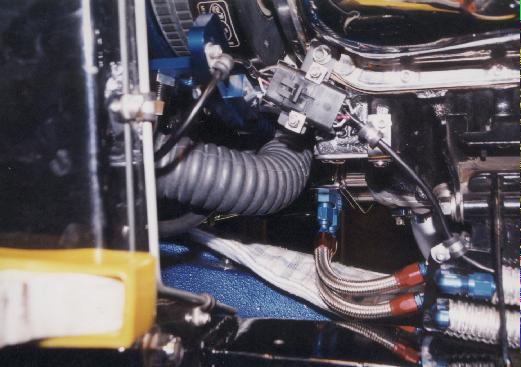
| A little different view of the final installation.
You can just see at the lower right side of the picture where I fished
the pickup cable under the fuel line heat insulation. That insulation
is quite a bit larger diameter than the 3/8" fuel plumbing, so tie-wrapping
it to the line and hiding it under the insulation got the wiring headed
in the right direction to the rear of the car and also protected from the
heat of the nearby headers. |
 |