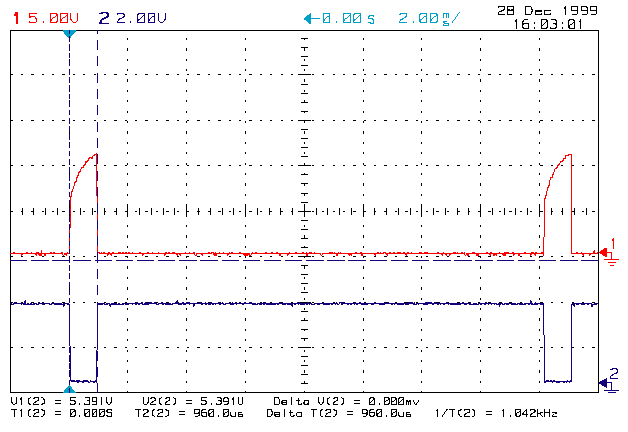
In Car Performance Checks

    The below plots were taken in the car under actual operating conditions.  I wanted to be sure that there was no unexpected noise or performance issues when all the hardware was actually installed in the vehicle.  I gave some extra thought on how wide and the timing of the CAM position sensing paddle in the distributor needed to be.  I wanted the flexibility to move the distributor around to optimize the rotor swipe area to cap, also to guarantee that the pickup signal was there when the ECM code looked for it.  This window gets smaller as the RPM increases.  With this current code it takes about 105us from the start of the ignition trigger handler to the point where the CAM positions sensor's state is read.  No matter how I positioned the cap I wanted to assure that there would be a stable state well before and after this point.  The plots below show that I hit it pretty close to the center.

A short Readme file on the setup conditions can be found here.
 

This was taken at 930 RPM.  We can see
that the trigger pulse width is about 5 degs.

- #1 = Crank Trigger Input (J1-23)
- #2 = 74HC14-3 Inverter Input
- Delta T = Width of Crank Trigger Pulse
 

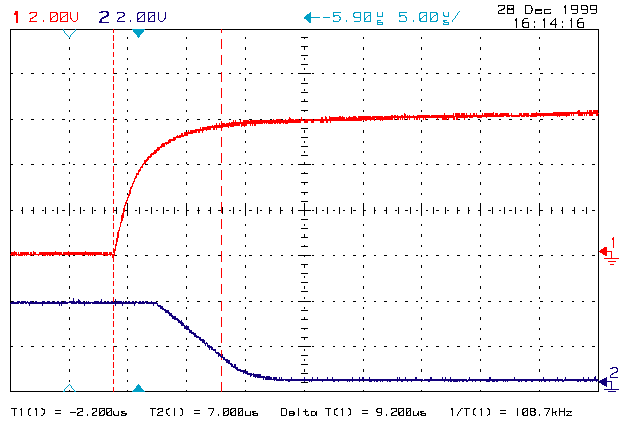
Good Propagation Delay.

- #1 = Crank Trigger Input (J1-23)
- #2 = 74HC14-3 Inverter Input
- T1 = Crank Trigger Rising Edge
- T2 = when inverter's output went high

Show the relationship between CAM sensor
and the Crank Trigger signals.

- #1 = 74HC14-1 CAM Sensor
- #2 = 74HC14-3 Crank Sensor
 

Expanded relationship between the CAM
input and the Cranks Trigger's.  Not 
centered but plenty of guard band.
Idling around 850 RPM.

- #1 = 74HC14-1 CAM Sensor
- #2 = 74HC14-3 Crank Sensor
- T1 = leading CAM pickup edge
- T2 = Crank Trigger edge

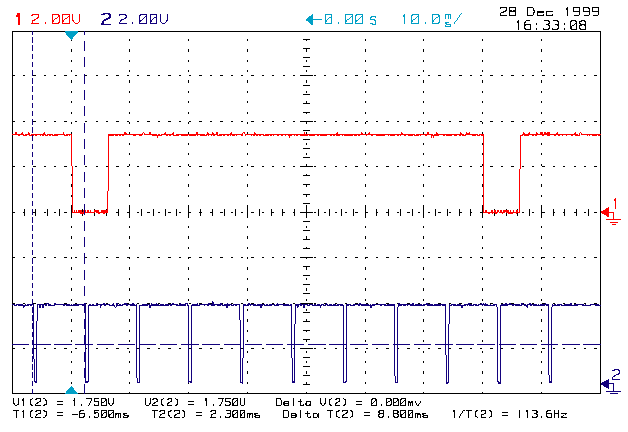
A littler faster here,  around 4300 RPM.
Look how noisy the trailing edge of the
CAM input is and also how much jitter
there is to the next (#8) cylinder's edge.

- #1 = 74HC14-1 CAM Sensor
- #2 = 74HC14-3 Crank Sensor
- T1 = leading CAM pickup edge
- T2 = Crank Trigger edge