Click to download the complete scoring machine design: GPLScoringMachine.zip
History
Back in 1997, my younger brother started fencing. Since the sport
sounded pretty cool, I watched him fence a few times. His fencing club
used the classic Prieur Competition scoring machines, which were expensive,
finicky, and old-fashioned--old fashioned because they used about a dozen
TTL logic chips and a few analog chips. All these chips could easily be
replaced with a microcontroller.
Intrigued by the possibilities, I located plans on the internet for a simple device that could download a program to a microcontroller, and I set to work developing a scoring machine.
After about two weeks, I took a prototype scoring machine to the fencing club in a cardboard box, and convinced some fencers to try it out. First tries are never perfect, and several problems cropped up. Soon after this experience, a kind soul--and armorer extraordinaire--pointed me to the fencing rule book, where I realized that my original design would not work at all. So I scrapped the design and started over. The result is the scoring machine design that you can download from this page. A third design effort evolved into the Eigertek Eclipse.
After the design was completed, I located a prototype PC board manufacturing
company and had four prototype boards manufactured. I built these into prototype
scoring machines using cases made from one-foot sections of extruded aluminum
storefront systems. Where are the four now? I kept one of them, a second
is still in use, and the last two survived a blaze that destroyed a Northern
California fencing club.
|
| The PC board for one of the earliest designs. |
Principles of Operation
This scoring machine design uses a scanning technique used by nearly all modern
microprocessor-based scoring machines. (Incidentally, a nearly identical technique
is used in TV remote controls.) The machine sends a signal down certain
wires (the B-line in foil, for example) and monitors other wires to see where
the signal comes back. It checks each side separately, so the signal meant
for one side doesn't interfere with the signal for the other side. Older scoring
machines used a separate battery for each side and diodes to accomplish the same thing.
The pulldown resistor network, RP2, ensures that an open circuit (such as a foil point being held down) goes to a logic low, which can be detected by the inputs on the microcontroller. A closed circuit creates a logic high signal.
The scoring machine logic interprets the input signals and applies the various timing parameters, such as the tip debounce (or dwell time), the lockout, and the reset time. The TMR0 register in the microcontroller helps lock down the timings.
The program itself is divided into four sections:
the initialization code, the foil program, the epee program, and the saber program.
During initialization, the weapon gets selected and the appropriate program invoked.
The selected program runs in a loop until someone turns off the machine.
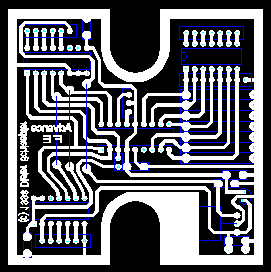
 |
| This is the PC board for a version of the GPL scoring machine. |
Things to do
You can do several things to improve this design, including:
Other issues and bugs probably exist; it's been eight years since I've touched the code.
Getting Up and Running
Your first task is purchasing components and programming the microcontroller.
The original scoring machine uses an older microcontroller that requires a special-purpose
programmer and an EPROM eraser. I'd recommend that you port the code to a more recent
flash-based microcontroller. Simple and inexpensive programmers and software can be found
through a web search.
After deciding on a microcontroller, the next step is to construct the circuit. All the parts are easily available from major electronics distributors such as Digi-Key, Mouser, and Jameco. If you need to, you can substitute individual resistors for the RP1 and RP2 resistor arrays. It's easiest to construct the circuit on a PC board, but you could also assemble it on a solderless breadboard for prototyping. If you decide to etch a custom PC board, you can use free software available from Eagle.
If you don't feel comfortable with a soldering iron or with making a PC board, practice your technique on smaller projects; the same goes for programming the microcontroller. If you've never programmed a microcontroller, you should try creating a simple "blinking LED" program. There are numerous tutorials on the internet you could follow.
Good luck, and happy building!
Eric Schlaepfer
Chief Engineer, Eigertek
Trivia
Q: Who owns Eclipse(my commercial scoring machine) serial number 1?
A: As a souvenir, I sent Eclipse #1 to Dan DeChaine, who gave me advice and encouragement. He knows everything there is to know about fencing equipment.
Q: Why are scoring machines so expensive? The cost of the parts is really low!
A: The price of a scoring machine, or any other piece of electronics, cannot be divided into just parts and profits. A manufacturer must spend money on engineering, prototypes, parts inventory, manufacturing, production testing, packaging, sales, support, and shipping, as well as the associated costs of doing business, including taxes. All those costs get rolled into the price of a commercial scoring machine.
