|
1. Make
an armature for your wings.
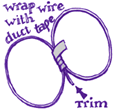
Shape the length of wire into a figure 8, checking as you go to make sure
the wings are the size you want and that both sides of the figure 8 are
equal in size. Wrap a short (3") length of duct tape around the center
join of the figure 8 to fix it firmly in place. If any wire ends are sticking
out, trim them with the wire clippers, and cover the ends of the wire
with duct tape so they don't poke you in the back. Test the armature by
tugging on it firmly; add more duct tape if needed.
2. Stretch
the pantyhose over the armature and shape your wings.
Take the scissors and cut the pantyhose into three pieces: two legs and
one "panty." Set the panty aside; it will become your wing halter.
Now stretch one pantyhose leg over each side of your figure-8 armature.
Pull it taut, but not so tight that it distorts the wings. Use safety
pins to hold the pantyhose legs in place at the base of the wings, and
shape your wings by bending the wire. Adjust the tension of the pantyhose
as needed. When you've got the shape you want, sew the pantyhose in place
at the base of the wings, and then trim off the excess hose (you can use
it for additional decoration or to extend your halter ties, if needed).
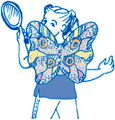
3. Decorate
your wings!
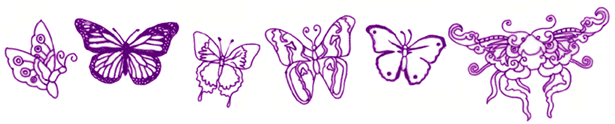
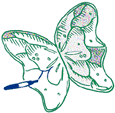
Using magic markers, draw in the basic lines of your wing design. Color
your wings according to your fancy, or if you want, you can look through
field guides of moths and butterflies to find a pattern you like. Embellish
your wings with glitter, feathers, beads... whatever you desire!
4. Create
a wing "halter" or ties.
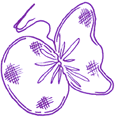
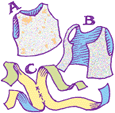
Take the leftover panty, and cut out the crotch area (this will become
the neck hole). You now have what looks like a very small tank top (A).
For small children, this halter can simply be pulled over the head; larger
folks will need to enlarge the holes and/or cut open the front of the
halter (B). Some fairies prefer to do away with the halter altogether
and instead use long ties that they wrap around their shoulders and torso
(C). You can also use a double loop of elastic, one loop per shoulder.
5. Attach
your wings to the halter (or ties).
Using needle and thread, securely attach your wings to the halter or ties.
Now for the fun part -- try them on! Use a hand mirror in front of a bigger
mirror to see if the wings are sitting even on your shoulders (or ask
a friend to check for you). If necessary, use needle & thread to adjust
the wing placement, or adjust the ties until the wings are as straight
as you want them.
6. Wear
your wings to the May Day Festival!
You may, of course, want to wear them at other times: to parties, friends'
houses, job interviews, even the supermarket. You can also make fairy
antennae to complement your wings--why not!
(Sad-but-true
disclaimer: fairy wings do not enable the wearer to actually fly, at least
as such action is defined within the realm of Newtonian physics. Flights
of fancy are excepted from this disclaimer whether they adhere to Newtonian
or quantum physics but we eschew any and all responsibility for any physical
consequences of such flights--or physick required to remedy said consequences.)
Wing
design ©1997 by Amy Grisham. Used with permission!
Thank you Amy!
|