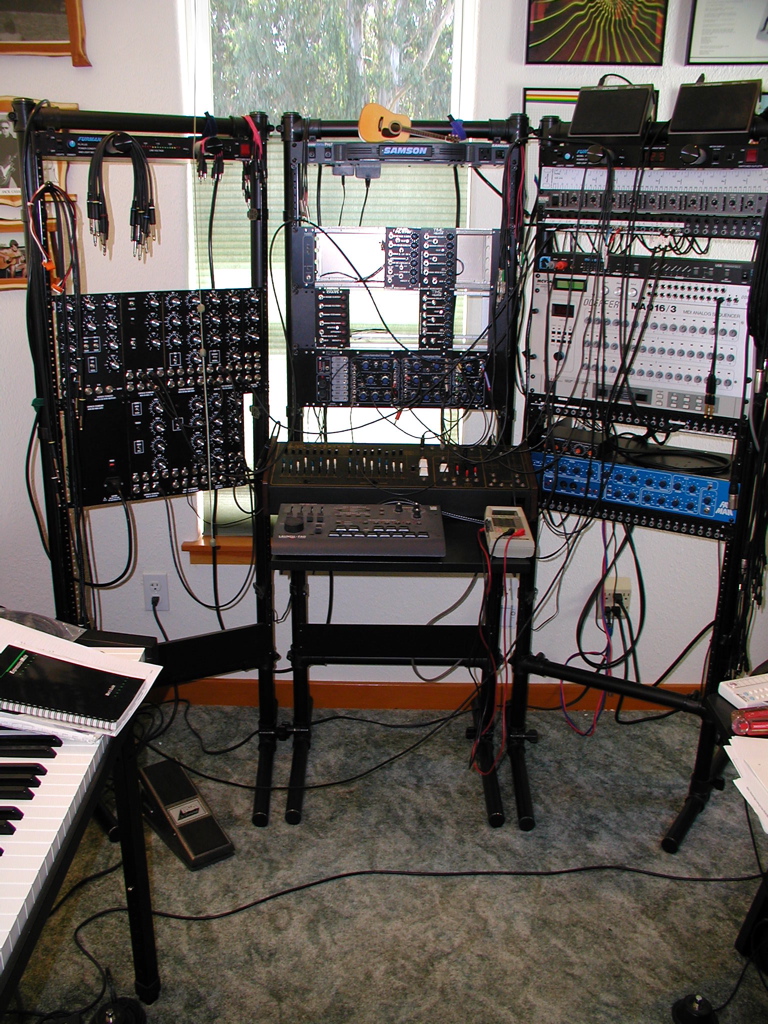
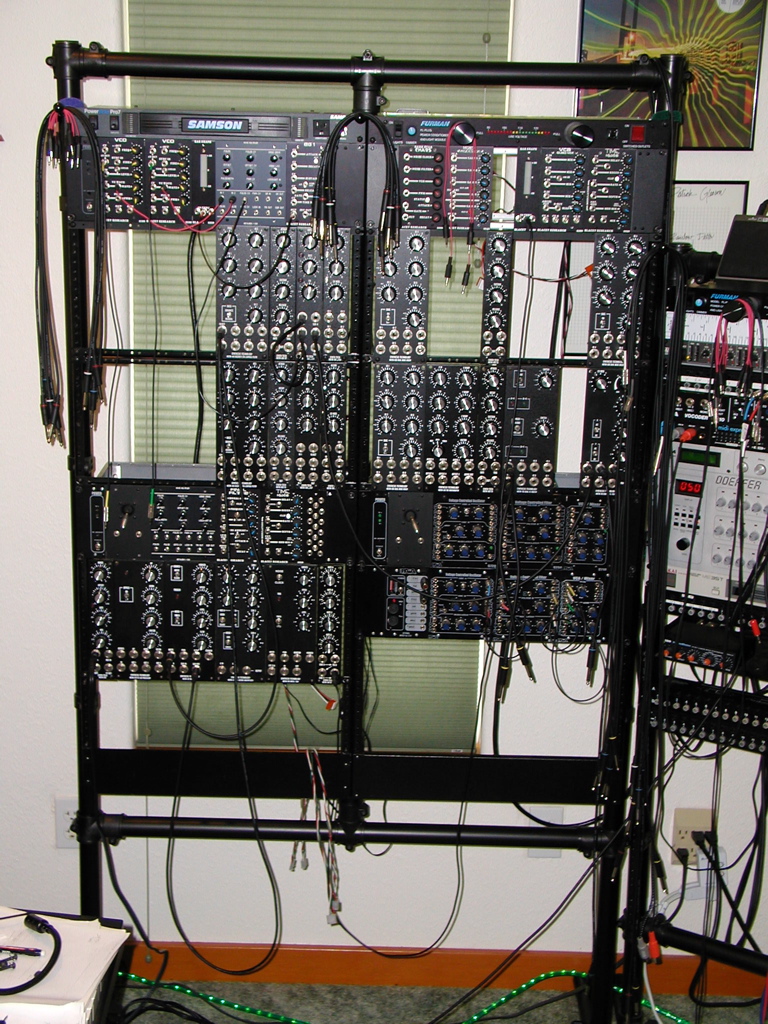
Modular synthesists seem to be constantly plagued with running out of available rack space, not only for system expansion, but also to allow for rearrangement of the system to suit specific studio or project needs. I'm always moving things around so certain aspects of the system will be within reach during sound design or recording takes. Over the years I've used all manner of rack housings and open rack frames. But it wasn't until I started working with custom layouts using Ultimate Thinker-Toy components that I found a setup that suits how I use the synth, and the degree of accessibility I desire while the synth is running.
Photos of construction techniques and final implementations are shown in the accompanying photo layout here. You may even want to open that link in a new window, so you can refer to it while reading below.
Unfortunately, as of 2005 or so, Ultimate Support Systems has discontinued their manufacturing of the Thinker-Toy components. But I will still reference their part numbers and descriptions here. These components are still available at some music retailers who built up stock, and from eBayers that are tearing down and reselling older Ultimate keyboard setups, etc. Also, very similar components are available from Gibraltar (modular drum rack components), and from Roland for their electronic drum components. Search online for drum specialty shops, and you will find much of what you need.
Bill of Materials, for 6' tall single wide rack: |
Bill of Materials, for 6' tall double wide rack: |
|
|
Construction is fairly straightforward, once all the components are cut to size and in hand.
Single Wide Systems
Build the leg bases and vertical tubing first. Those can be tightened down at this time.
Then install the lower cross strut. Then the 3 Universal Fitting mounts up the vertical tubes, with the flatted mounting surfaces facing to the outside. Then assemble the upper cross strut. Leave all of these fittings loose during construction. Tighten only enough to hold them in place, but they need to be able to slide or rotate with a little force.
Any size rack rail can be used, but the Middle Atlantic RRF27's are a good height (47-1/4" height), and a commonly stocked part. Other manufacturers may have other lengths available. So you could get another 8 or 10U by using other rail components. Depending on the rack rail components used, you may need to adapt or modify things a bit. The Middle Atlantic rack rails I used almost fit the UNF-150 mounting flange depth perfectly. I used a bench grinder to put a slight 1/8" notch at the mount locations, and everything fit perfectly, and even had some room to wiggle, to help with the dimensional fine tuning before tightening everything down. Close-ups of this are shown in the project photos.
Install a couple 2U blank rack panels at the top and bottom of the rack rails during assembly, to check for square and relative side-to-side spacing of the rack rails themselves. Once everything looks level and square, tighten down all the allen bolts in the fittings.
Double Wide Systems
Build the verticals and feet first, and tighten those components.
Then slide 2 T-Fittings on each vertical tube. Build the "H"-shaped cross-member unit separately. Then install the 2 cross-member tubes into the 2 T-Fittings previously installed on the verticals. Leave all of these fittings loose during construction. Tighten only enough to hold them in place, but they need to be able to slide or rotate with a little force.
Then deal with mounting the rack rails as detailed above. At the center support post, place the 2 rack rails back-to-back when mounting to the Universal Mount flanges. Depending on your rack rail construction, you may need to use slightly longer allen head cap screws for those mounting bolts.
Options
Replace the silver allen head cap screws provided with the Ultimate fittings with black oxide equivalents to get a more finished look. The black oxide cap screws are optional. But the rack looks great all blacked out.
The end caps go in the tops of the vertical tubing. Those could be optional but keep dust and varmints out of the tubing. ;-)
A couple views of the original 5 foot model, and the current 6 foot model, partially loaded, and coming to life:
Initial 5 ft. high models |
After expansion to 6 ft. high, and double wide racks |
More pictures of the current setup, loaded and in use, can be seen in the Archives in the Current Studio pics here and here.
updated 3/30/11